The 4x4 Mini-Design Brief
A quick method to build a creative brief for small projects
I’m a huge fan of creating design briefs for every design project I do. It helps to focus efforts, clarifies different perspectives and if I work together with others, it provides shared understanding on what we’ve set out to achieve. Watching the same TV show, as my colleague Norbert Levajsics usually says.
While there are many descriptions on what a design brief should contain, I like the Short-Form Creative Brief by Jared Spool. It focuses on a few key elements helping product teams to align, and leaves out the agency-style contractual sections like timing and checkpoints. Defining the goal, the key personas, the important scenarios and the design principles sets a good starting point to create a product or a feature.
But to create a good brief takes time and effort. Even with a clear business goal, user research is needed for any no-bullshit statement about the personas and scenarios. For truly useful principles, you also need to have some additional knowledge about your context gained through synthesising your data.
For small projects taking just a few days, you probably won’t have time for this type of preparation, but a brief is still useful. So I created a quick method that results in a brief in a about an hour even when working with a team.
The 4x4 Mini-Design Brief
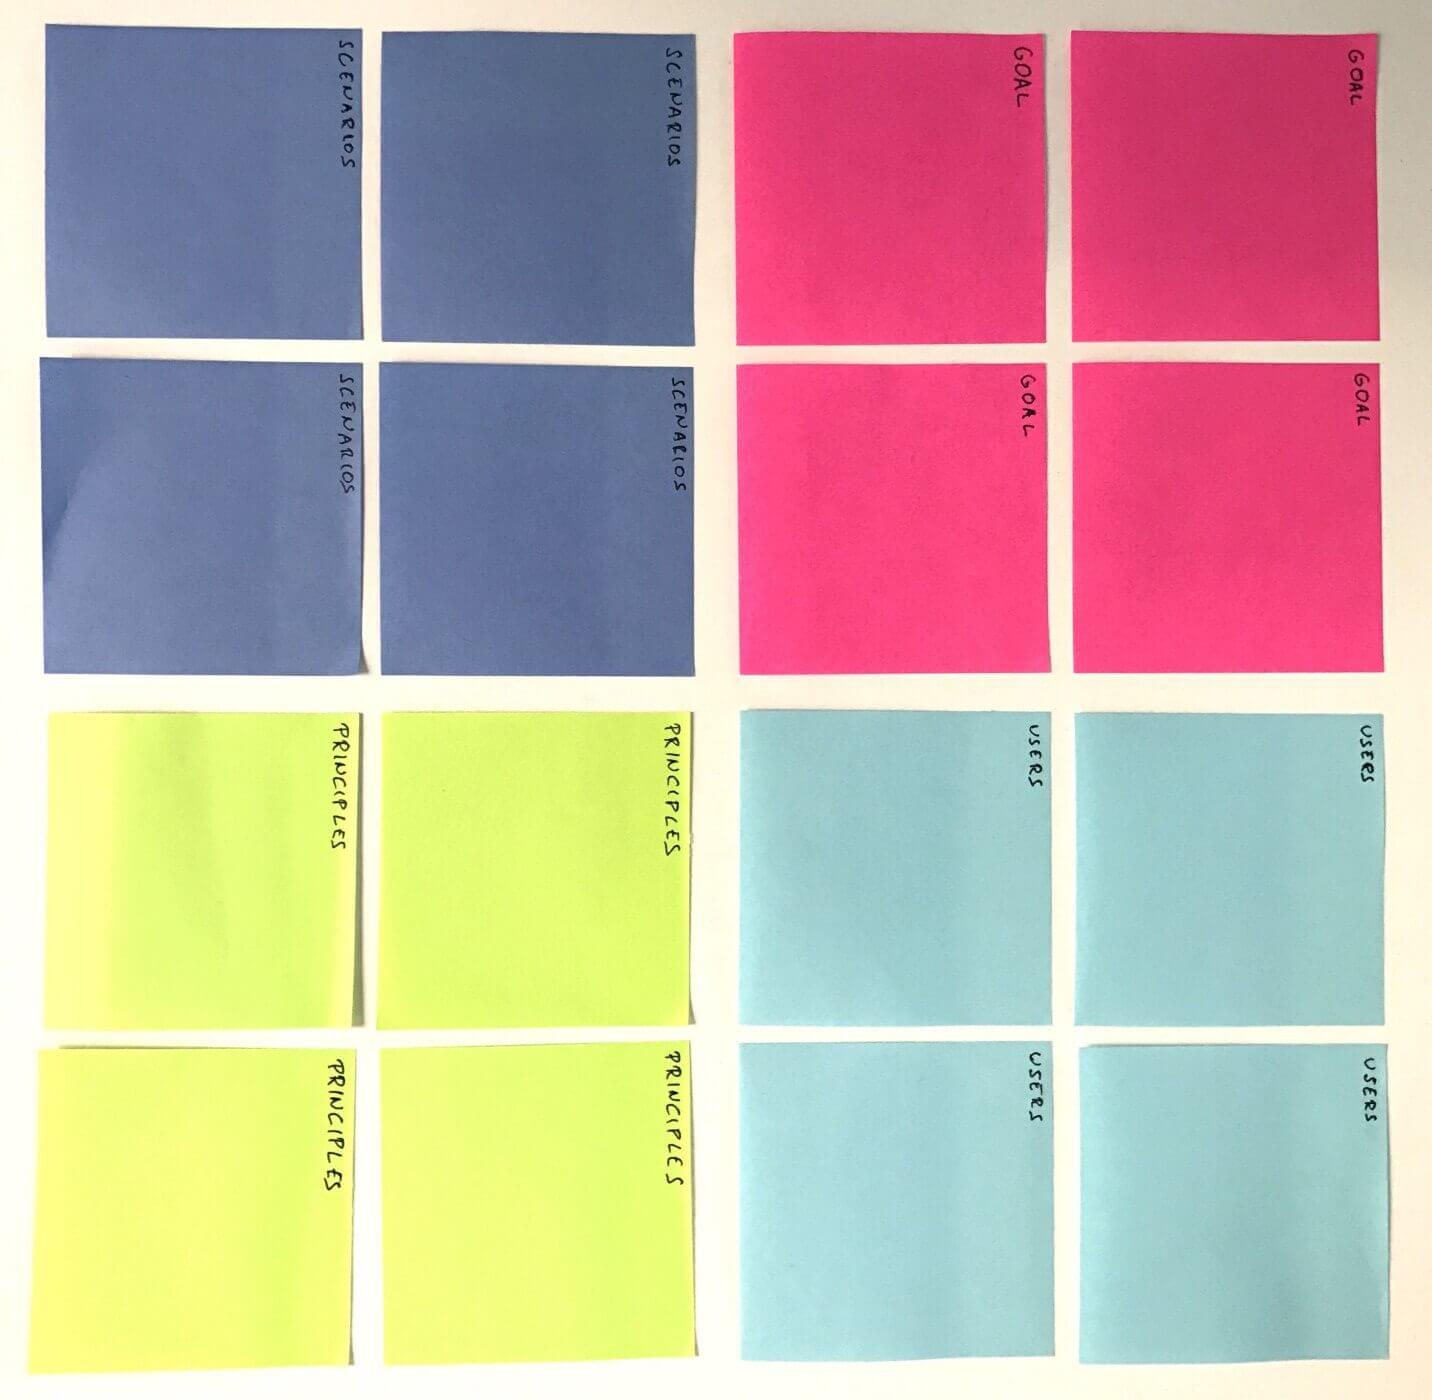
I kept the format of having 4 sections: goal, users, scenarios and principles, but limited the amount of information to 4 ideas each section. Hence the name. For a specific project there could be 3 or 5 ideas in a section, but the point is to not to try to add too little or too much information. A way of not getting too caught up in the details, is to brainstorm ideas for each section for a few minutes, then prioritize and cut where you have more.
Why 4 ideas? I want a nice level of detail that is helpful for the design process. Fewer ideas and there is a risk of being too general to be useful. More pieces of information may take too much effort to produce or end up too fine-grained to leave enough space for potential design solutions.
Putting the ideas on stickies help in two ways, for one they will limit the amount of information for each idea, so they won’t get too wide. Stickies also act as a more physical way to keep track of, so you will be able to manipulate and prioritize them more easily.
The ideas should be written pragmatically. So if you don’t have information about something, rely on your assumptions and validate later by getting feedback or doing a test. But you should be clear if you are acting on facts or assumptions. There may be additional constraints, like a mobile solution is needed. These can be formulated into one of the sections, to limit the amount of information to think about.
The Brief Workshop
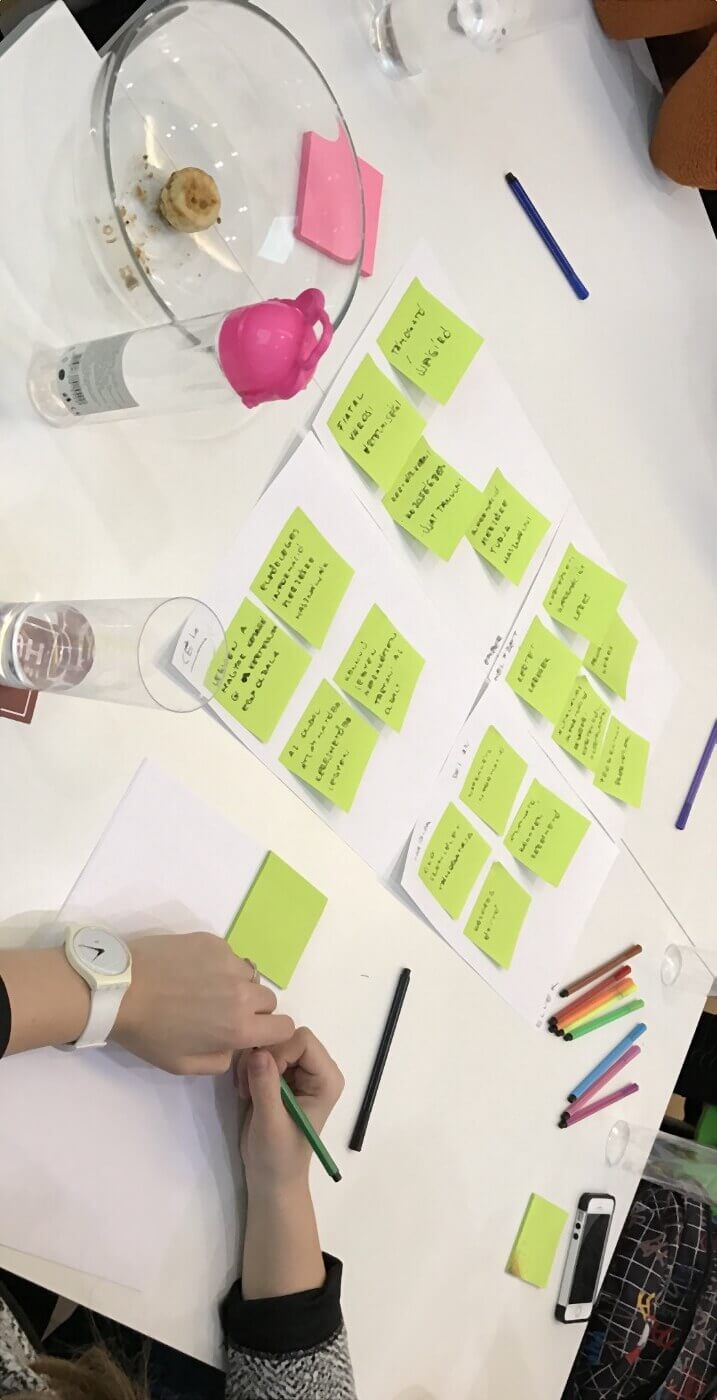
When not working alone the goal of the brief is also to build consensus on what the team wants accomplish. In these cases creating the brief together helps to build the shared understanding within the team. Sometimes this process is even more useful than the brief itself, as it surfaces assumptions and different views between team members.
You will need approximately an hour for this exercise. Book a quiet meeting room with enough stickies, and marker pens like Sharpies. (I like to go with such pens, as it also limits the amount of information one will write down.) Invite all relevant team members and decide who will facilitate the workshop.
- 5 minutes: Explain the goal, how this will benefit the team, and the basic workshop rules if needed, like no mobile and laptop usage.
- 4x10 minutes for the sections: Spend around 3 minutes to brainstorm ideas alone, one sticky — one idea; 3 minutes on presenting your ideas to each other; 4 minutes to group and prioritize together. Merge and extend stickies as needed. This part needs to go dynamic, don’t worry too much about leaving something out, important things are bound to come out from a diverse enough team.
- 10 minutes: Review the mini-brief together. One way of finding gaps and inconsistencies is to try to tell the brief in one statement: “We’ve set out to accomplish this goal… for these users… using the product in these scenarios…, our solution will fit these principles….”.
- 5 minutes: Decide where the brief will be kept (preferably in sight of the whole team), what’s next, wrap up.
Writing ideas for each section might be hard for some people who haven’t written a brief before, so I compiled a list of questions that help in formulating ideas. You don’t need to answer these questions in your brief, it’s just to guide what type of statements to write down. Some might sound misleading, but I usually don’t worry about it, since the group process clarifies any misunderstandings.
Goal:
- What’s the goal of the project?
- Why doing this specific project makes sense?
- What will be better once the project is finished?
- What’s your individual stake in this project, your motivation?
- What’s the situation we want to improve?
Users:
- Who are the personas or roles who would use the result of this project?
- What persona or role is this project important for for?
- What is the main pain point (the personas have) this project solves?
- What goals the personas have will this project support?
- How will this project make the life of the personas easier?
- Why would the personas use the results of this project?
- What is the most important data point we know about the users?
Scenarios:
- What are the important flows and use cases for the users in this project?
- What would the users do while using the result of this project?
- What are the repeat and one-time activities of the users?
Principles:
- What are the quality attributes we want to see in the solution?
- What do these attributes mean to us in this project?
- What attributes would make the users love this solution?
- How would we know our solution is the best possible?
While this method probably doesn’t catches the amount of detail a more sophisticated product needs, it’s fast way to set target for a small project and to build shared understanding within your product team. Let me know how it goes if you try it.
Thanks for the kind participants of the xLabs Intensive UX course who bared with me while I was refining this method on one of our workshops.